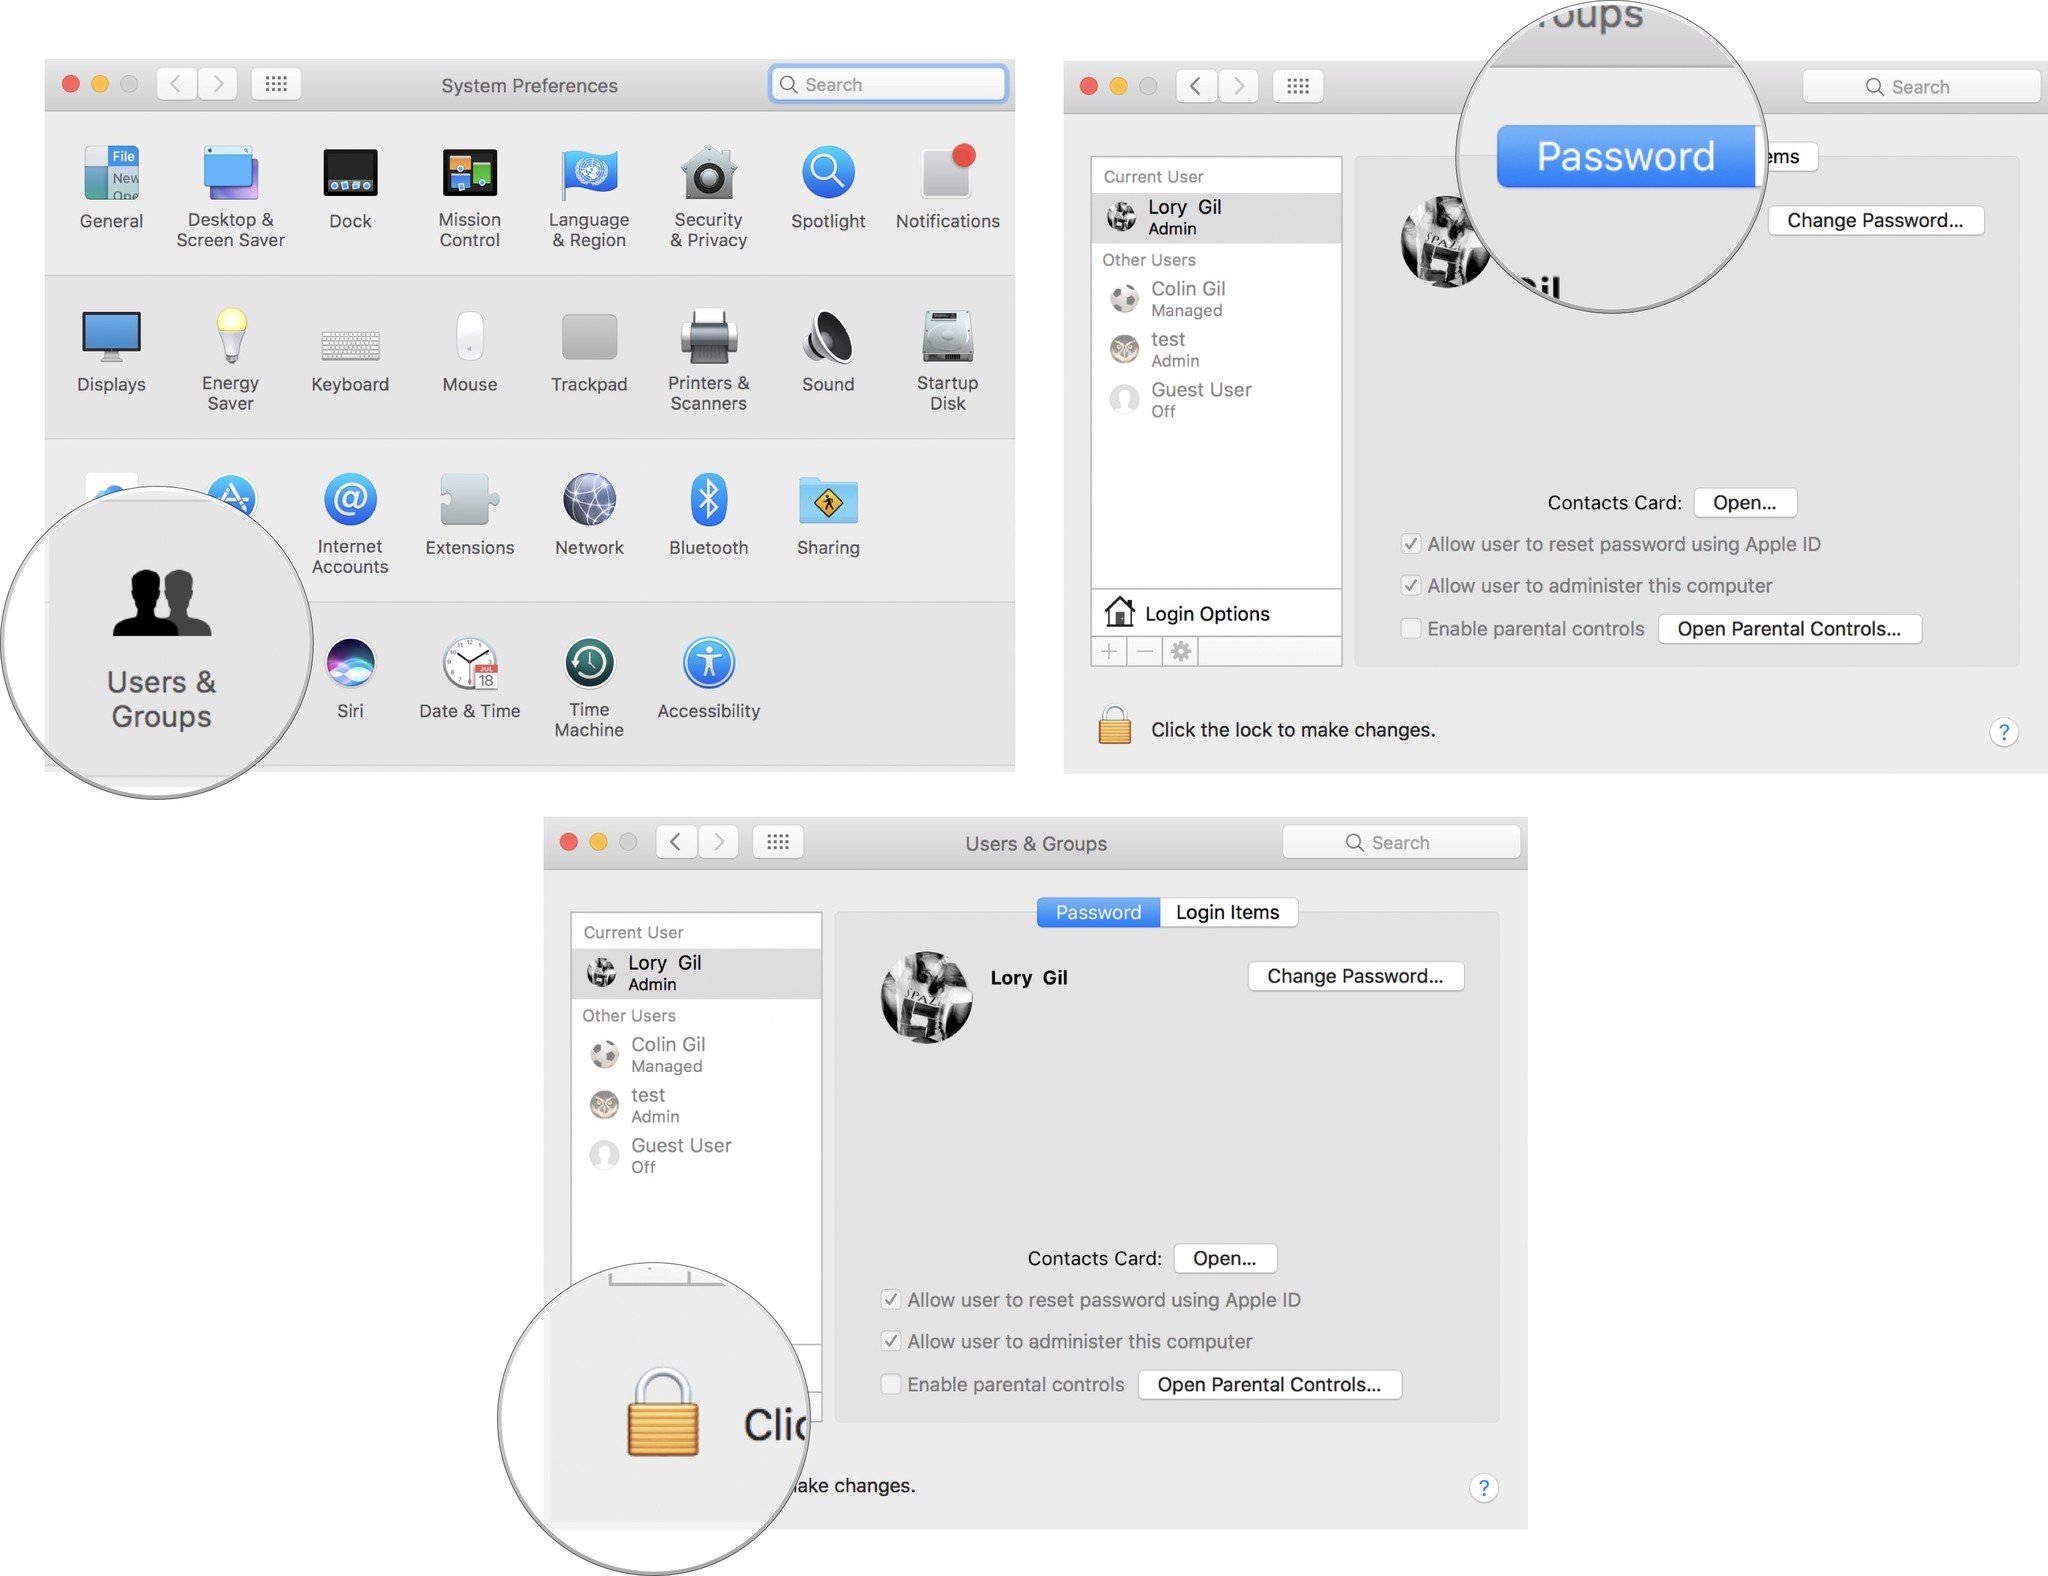
How To Use A Mac For Windows Users
What percentage of iPhone users use a Mac/PC/neither (at home)? Update Cancel. A d b y C i r c l e C I. We are not against PC's, there is just simply no point in allocating space to a dedicated Windows machine at home. Then there is the Apple TV factor involved of course, etc. 902 Views View 1 Upvoter. S p o n s o r e d b y M o n g. Making the switch: a Windows user's first MacBook (part 1) Making the switch to Apple and OS X can be a little daunting for casual Windows users. Here's a rundown of how you can adapt to your new.
Handbrake is the best for ENCODING movies, but not quite the best for ripping them. If your doing a large amount of DVD's then it would be better to use a combo of a ripper, encoder and tagger. Plus you can do them in 'batches' which is much more time efficient. And Handbrake has long been considered as one of the best free open-source video transcoders in global market for Mac users to choose for converting videos to different formats. Although Handbrake (including 1.0.3) provides Mac users a handy video converting experience, it is still far from perfect in terms of the output format and newer Mac OS compatibility issue. To rip a DVD with HandBrake. Now insert your DVD into your Mac’s DVD drive and launch HandBrake. From there you can scroll through ten still images from the title or, if that’s not. Is handbrake still the best for mac pro. HandBrake for Mac is a program that lets you convert multiple types of video files into MP4 or MKV format, while specifying other output characteristics, as well. Handbrake Settings 1080p 60FPS NO QUALITY LOSS 2016 Quick and Easy Guide, No Stress, No Mess Handbrake Download Hey guys wanted to make a quick video to follow up my Dxtory.
The Mac platform now has more users than at any time in its long history -- and more and more Windows veterans are making the switch. But moving from Windows to the Mac can be a bit of a challenge. In this article, we'll offer some helpful tips that will make this transition a bit easier, and help your users get up and running on OS X in no time at all.
1: Finding the menu bar One thing that is not completely apparent to new OS X switchers is the menu bar that spans the top of the screen. Mac os x xcode emulator. This menu bar is separated into two distinct sections. On the left of the menu bar is the Apple menu and app-specific menu items.
On the right is the system tray that gives you access to menu bar apps and system settings, as well as Notification Center. Inside applications on the Mac, you won't see menus like you do on Windows systems.
Again, look to the top of the screen. There, a list of commands will be available from the File, Edit, View, Window, and Help menus. This menu bar will change depending on which app is in the front and selected. The title of the app appears next to the Apple menu.

2: Installing apps If you've ever installed software on a Windows machine, you know how involved the process can be, especially when you have to walk through the steps in the installer software. OS X offers a few ways to install software, and none is as involved as Windows installs. For basic installs, you might download a disk image or a zip folder from a website containing an.app file.
This self-contained file just needs to be dragged and dropped into the Applications folder in the Finder to be installed. Launch it from the Applications folder, and the app will run properly without going through a setup process.
Very rarely, you may encounter an app setup flow similar to what you might find on Windows. These installers are usually distributed through larger companies like Adobe or Microsoft and are generally frowned upon by the Mac community due to their needless complexity and their tendency to install files in various places around the OS. If you encounter a setup file like this, you don't need to drag and drop it in the Applications folder. Instead, you can run it from the Downloads folder and then delete it after the installation has been completed. 3: Using Finder and System Preferences Windows Explorer is replaced on the Mac by the Finder. The Finder is the 'smiling Mac' icon in the Dock that always sits at the left-most space.